At the end of my last entry I said I
would discuss the modeling tool that I used to design our layout. I
had an initial pencil sketch that was derived from looking at other
layouts and then combined with the physical constraints of the space
I had available in my workshop. However, I needed a way to formalize
the drawing into something that could be implemented.
After looking at the various software
programs available online I decided on a program called AnyRail.
There were numerous tutorials on Youtube to help get started, it
appeared to have a large library of track components from a variety
of companies and it was free...well almost. There is a free version
which lets you use up to 50 track pieces in a design. Surprisingly,
this worked out quite well until we decided to add the switching yard
which put me over the 50 piece limit. I could have split the layout
into sections and kept them in different files but in the end I
decided to purchase the program. You can do some interesting things
with the program, like set track heights and compute slope
percentages and it just seemed easier to do if I had the complete
layout in one file. So....I paid the $60 for a license. It seemed a
little steep but I think it was worth the cost.
Here is a screen capture of the
AnyRail website.
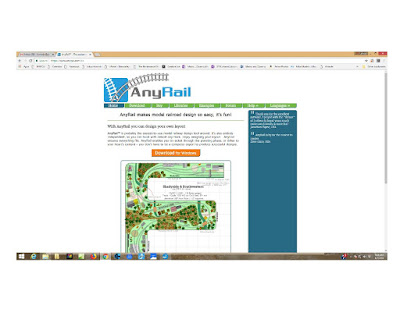
AnyRail website
As you can see, you can produce a
really nice layout that includes the track and structures/objects
from libraries of manufacturers products. Now that we have our
layout pretty well planned I'm going to start exploring some of the
features to help plan our scenery. You can also look at layouts in
3D...here is another screen dump from their website.
 |
| 3D view of a sample Layout from AnyRail |
Here is the 'final' design of our
layout.
 |
| Current design of our layout |
There is a logging camp area, sawmill
area, town area and switching yard area. We also have a small
farming area if space permits. The left leg is about 8 feet long and
the top leg is about 14 feet long.
AnyRail is very easy to use. As
you can see in the image, you can define your layout bench shape and
use that as a background. You can setup various settings to define
things like layout size, grid spacing, alerts for minimum radius
curves, snap to grid and snap to track endpoints, auto-connect, etc.
You can see this in this image.
 |
| Setting Options along the top Ribbon |
Then you can select track part
libraries from various manufactures to use to build your layout. It
is basically drag and drop. Once you've selected an object, like a
piece of flex track, you can change it's shape using various
menu selections. In the case of a flex track you can define it's
length if straight, or curve length and radius if it is a curve or
easement. You can move it, rotate it and move it next to another
piece of track and have them connect together.
 |
| Menu Options for Piece of Atlas #500 Flex Track |
One of the best features, and the most
frustrating, is the alert when you create a curve that is less than
the minimum curve radius you set in the settings. When creating a
curve and trying to have it meet up with another piece of track
coming from another direction you want them to meet up and connect
together. It can become very frustrating to have them very close but
when they auto-connect one piece has to change shape a little so that
it connects squarely into the other track piece. In the image the
track marked with a red line shows that the minimum radius of that
part of the track has fallen below 18” which is my minimum radius
setting. What's a little 6” radius curve among friends.
 |
| Red Highlight for Tight Curve |
The feature we are playing with now is
the capability to set a track section height and then the slope
of
adjoining track to go up to and back down from that height. For
example, you can set a piece of track to be a bridge at four inches
high and then compute a 3 percent slope in each direction. This will
help us determine the heights we can achieve for the track heights in
the logging area around the mountains we have planned. Here is an
example.
 |
| Heights and Slopes |
The final feature I'll mention is that
you can create various sections within your layout. Our layout has
four major sections....the outer track, the switching yard, the
reverse loop in the logging area and the reverse loop in the town
area. This will help in our DCC wiring planning.
 |
| Track Sections Highlighted in Different Colors |
Now that our benchwork is pretty
complete we need to transfer our track plan to the benchtop. We are
going to use the cookie cutter approach to track layout. AnyRail
can print a full size printout. When I did the print dialog box
said 208 pages!! Luckily it went down to 97 when I clicked on the
suppress blank page option!
 |
| One page of 97 to Print |
Next step....tape all those pages
together!


