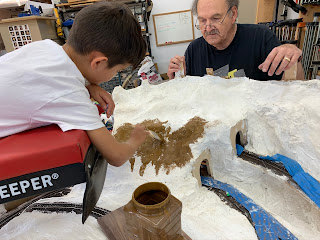
Therefore, activities are now moving into scenery construction. Our last post showed Aiden & Anthony helping to put cardboard strips down in the logging area and using plaster cloth to cover the strips. That went very well and we have expanded that into the mountains area as well. This past weekend Aiden was out once again and we started to paint the plaster with some earth tones and to sprinkle dirt onto the wet paint.
 |
| Aiden painting earth tone onto the mountain area |
 |
| more painting |
 |
| A flour sifter filled with very fine dirt to spread the dirt onto the wet paint |
 |
| Aiden thinks he is flying on the Creeper |
The mountain area painted and dirt spread onto of the paint. This is the base layer but you can see the rolling terrain really nicely. Our next step is to add various other layers of ground coverings to make it look more and more realistic. We are using very small shavings of Tiger Maple wood that come from the jointer and planer to simulate some mossy ground cover. The type of ground cover you would see in a forest. We will take the shavings and dye them with some Light Brown dye and sprinkle them over the terrain in a random fashion.
Jeff is putting diluted glue onto the ground covering to keep it in place. You can see in the picture that we've applied the mossy ground cover along with s mixture of different colored field grass. We used a static grass applicator to apply the grass, It is supposed to make the grass stand up but that didn't work to well today. Not sure if it is machine or operator error!! Additional glue is dripped on and also sprayed on with a spray bottle to help keep things in place.
Next steps:
We will continue to expand around the curve in the mountains and continue this process. Once the initial ground base in down we will take out the wooden tunnel portals and replace them with painted stone portals. There is also a waterfall, pond and creek that will get painted and simulated water applied. However, the big project now is to make trees and more trees and more trees.....you get the idea!!


No comments:
Post a Comment